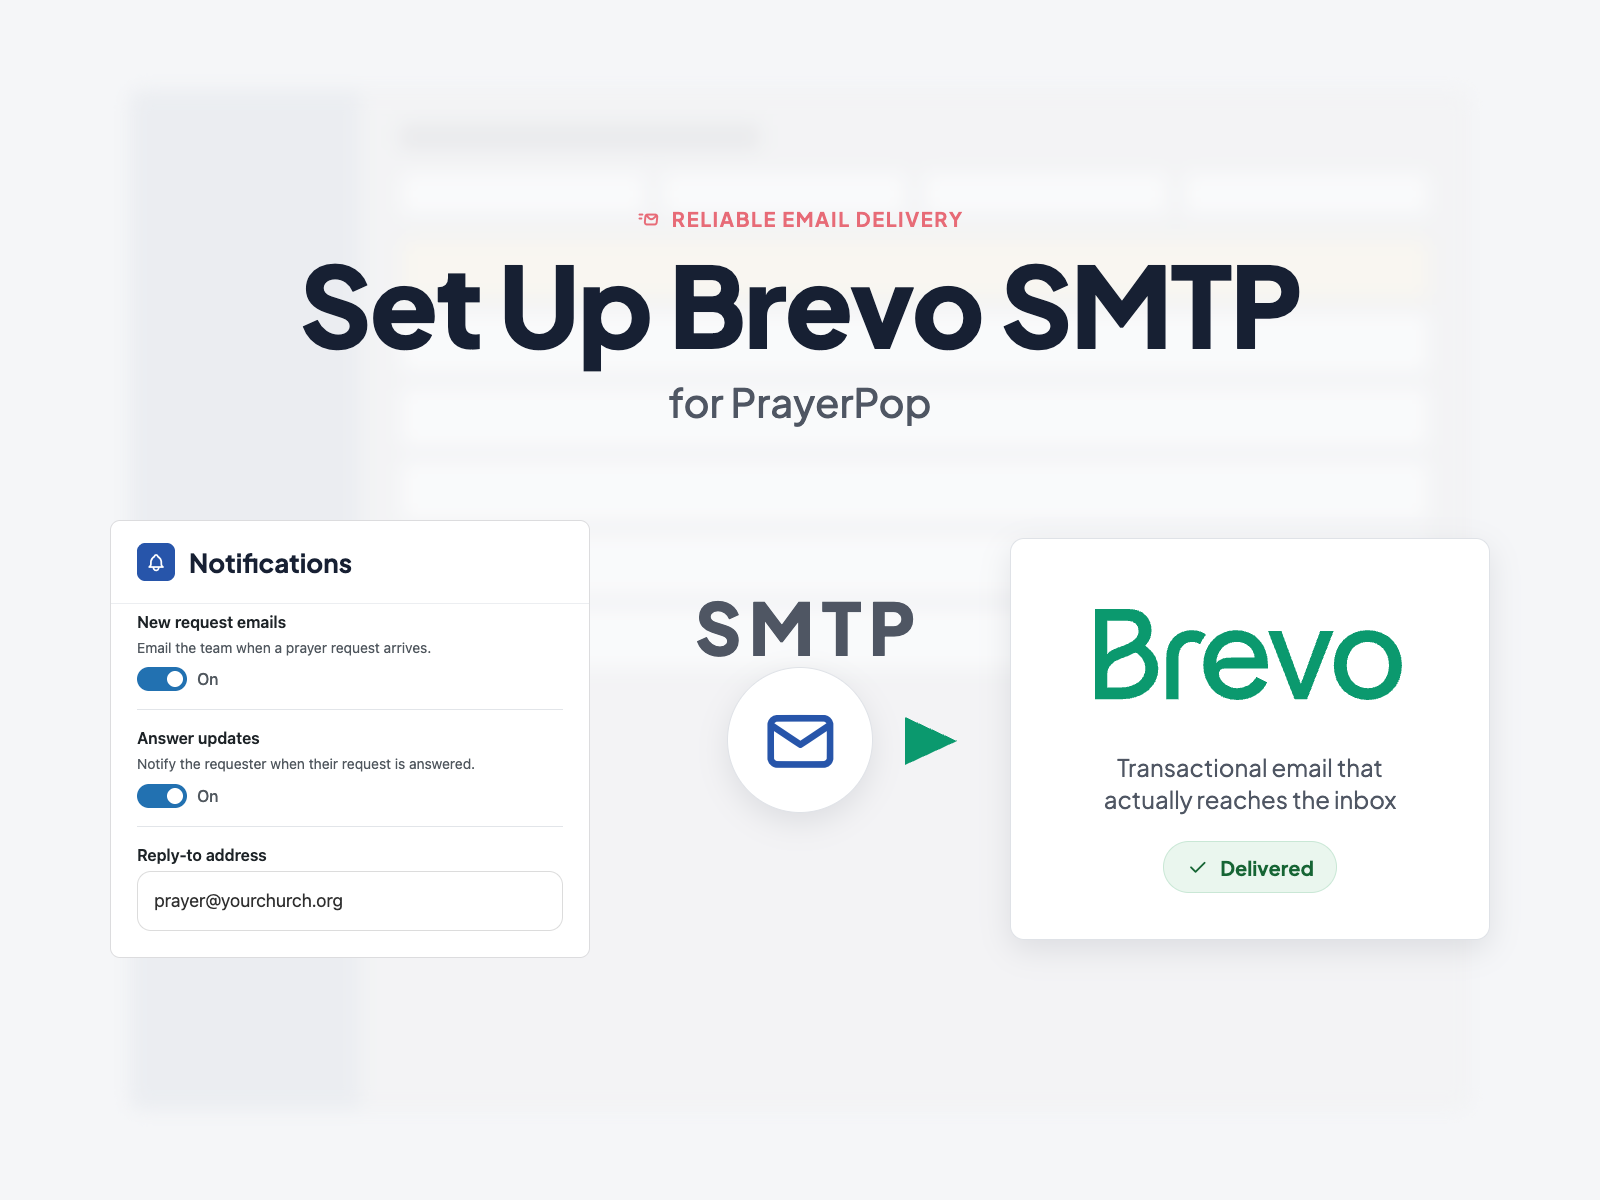
PrayerPop emails your team when a prayer request, chat message or campaign signup arrives. If your web host fails to deliver that email, nothing visibly breaks. WordPress reports success, nobody complains, and a request sits unread for days.
This tutorial routes every email your site sends through Brevo instead, using the free FluentSMTP plugin. Setting up Brevo SMTP takes about twenty minutes and fixes all WordPress email, not only the PrayerPop notifications.
Why WordPress email goes missing
WordPress asks your web host to send mail using the server's own mail function. Five things commonly go wrong:
- The host forbids outgoing mail. Many hosts block or restrict PHP mail and outgoing mail ports to stop spammers. The message dies before it leaves.
- No mail service is configured. Some hosting packages have no working mail setup at all. WordPress reports success. Nothing went anywhere.
- The mail looks fake. Your site sends from office@yourchurch.org, but the server is not authorised to send for that domain. Gmail and Outlook see the mismatch and file it as spam.
- The server's reputation is damaged. On shared hosting you send from the same IP address as strangers. One spammer among them taints all of it, including yours.
- The host's software is outdated. An old PHP version or a broken mail component fails silently, with no error in any log you can see.
Each of these fails invisibly. Most churches find out weeks later, when someone asks why nobody responded.
Brevo fixes all five: it authenticates your domain, keeps a clean sending reputation, and logs what happened to every message.
What Brevo SMTP costs
The free plan sends 300 emails a day, reset daily, no rollover. Past that, Brevo queues up to 1,000 transactional emails until the reset and drops the rest.
Twenty requests a week with two reviewers notified is nowhere near the limit. A campaign to 400 people in one go is.
The free plan adds Brevo branding to emails. Check your first test message.
Before you start
- WordPress admin access
- A Brevo account, created in Step 1
- Access to your domain's DNS settings, needed in Step 3
- An inbox you can check
No code or file editing.
Part 1: Create your Brevo account
Step 1: Create the free account
Go to brevo.com and sign up with your email address and a password. If Brevo asks you to verify your phone by text, do it now. It happens once, and Step 5 will not work without it.
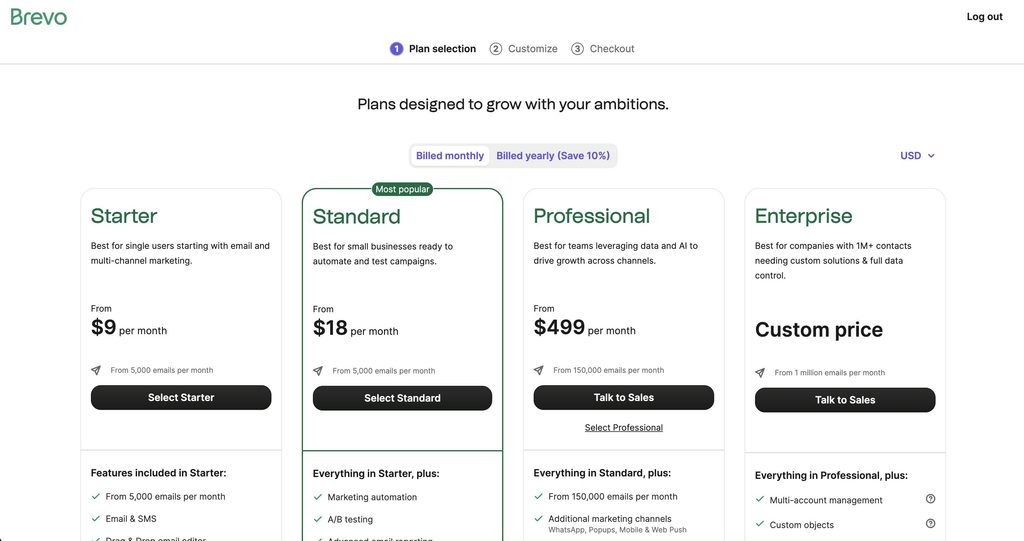
Scroll down from that view to find this:

Choose the free plan unless your church already sends large volumes of email.
Part 2: Authenticate your domain and sender
Both steps happen under Senders, domains, IPs in Brevo's left sidebar. Together they tell Gmail and Outlook that mail claiming to come from your church really does.
Step 2: Authenticate your sending domain
Open Domains, add your church's domain, and Brevo shows a few DNS records.
Add those records in your domain provider's DNS settings, then return to Brevo and click verify. A green authenticated status means you are done.
Skipping this is the main reason correctly sent email still lands in spam.
Step 3: Confirm your sender address
Open Senders and check that one exists with your church's real address, for example office@yourchurch.org, and your church's name beside it.
If not, add one. Brevo emails that address, and clicking the link verifies it. Use this address as the From address for the rest of the tutorial.
Part 3: Create the Brevo API key
Step 4: Open the API key page
Click your account name at the top right, then Settings → SMTP & API, and stay on the API keys tab.
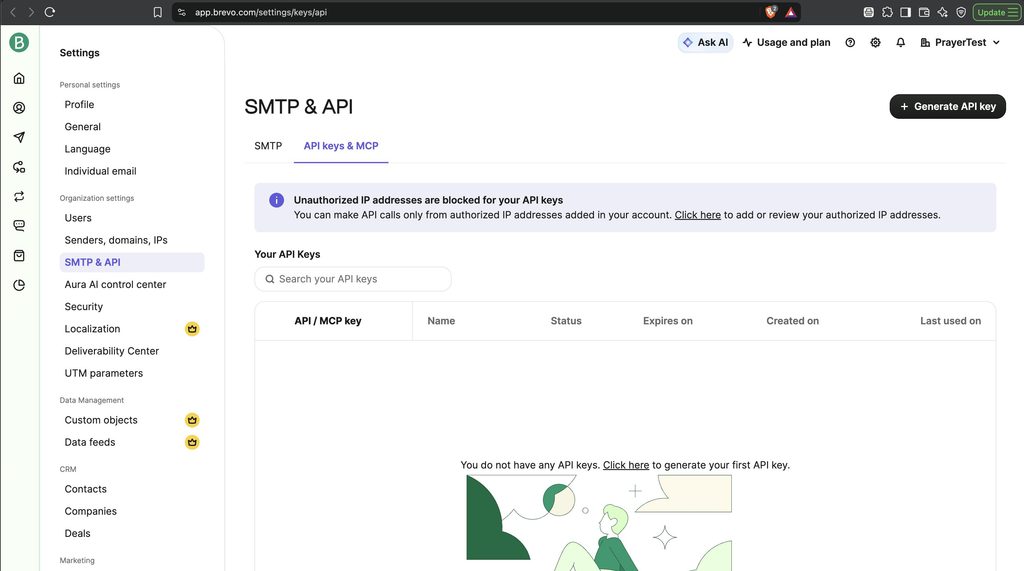
This is where the connection between your website and Brevo begins.
Step 5: Generate the key, and skip IP blocking
Click Generate API key.
If a dialog asks about blocking unauthorized IP addresses, choose Cancel.
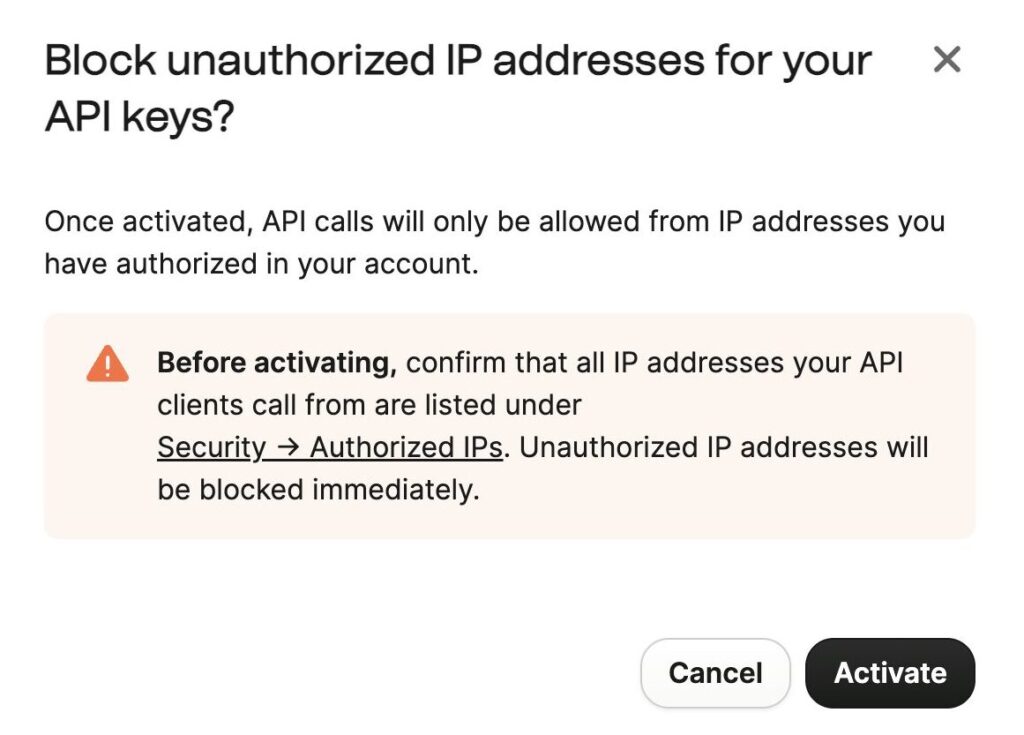
Leave this off. If you switch it on and your host's IP address later changes, your email stops until you approve the new one. Troubleshooting covers this if it is already on.
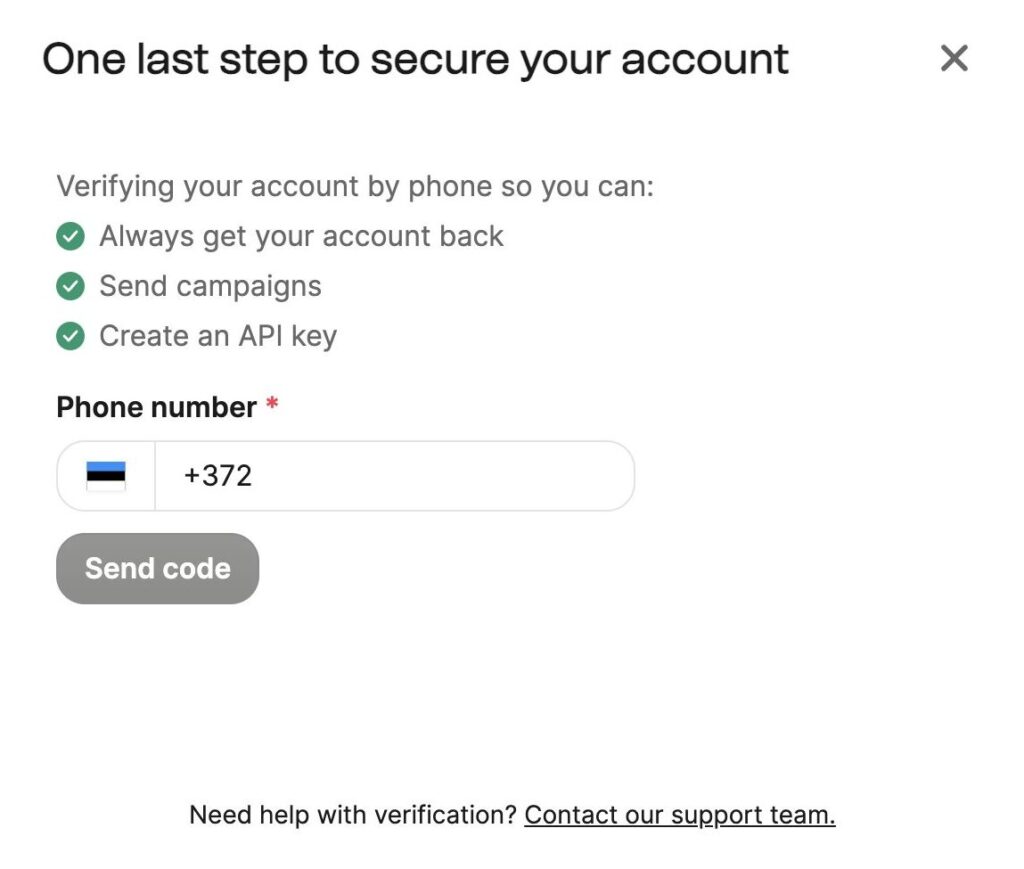
f you skipped phone verification at signup, Brevo asks for it here.
Step 6: Name the key and set no expiry
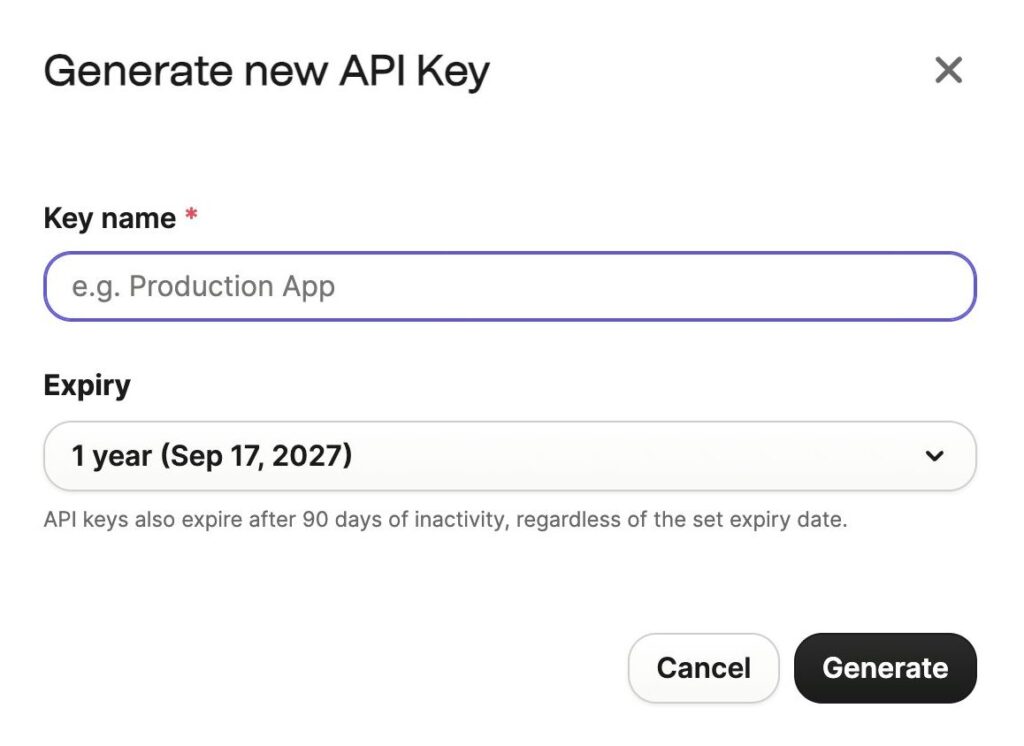
Name it "Church website" so you know later what it is for.
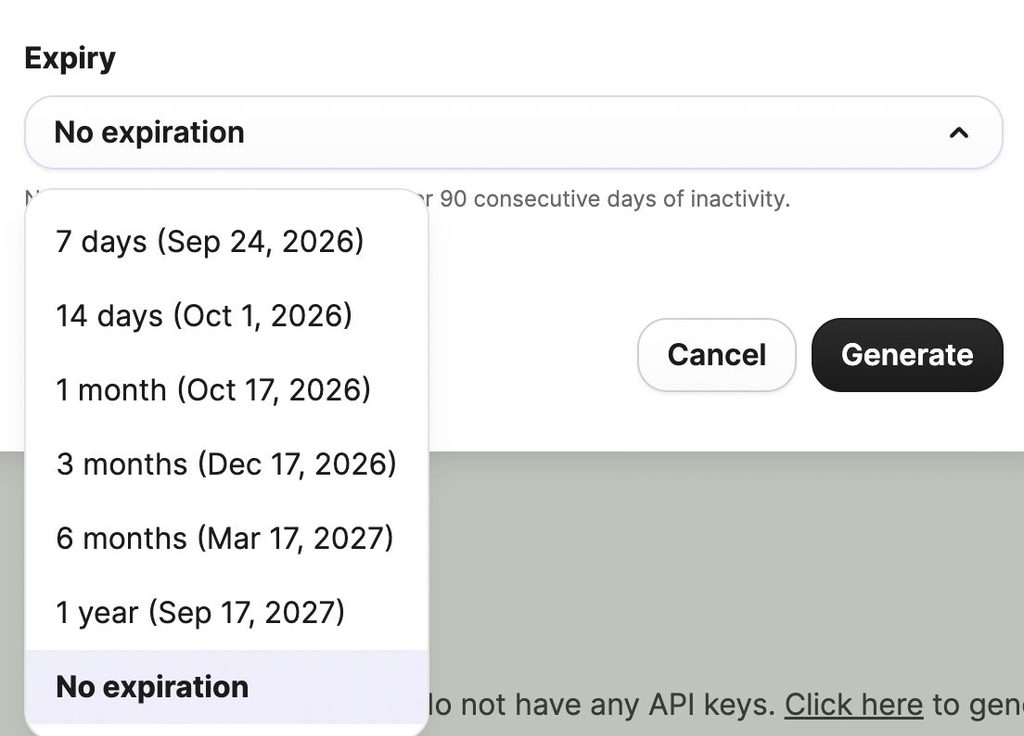
Choose "No expiration", or your email stops on a date a year from now.
Click Generate.
Step 7: Copy the key immediately
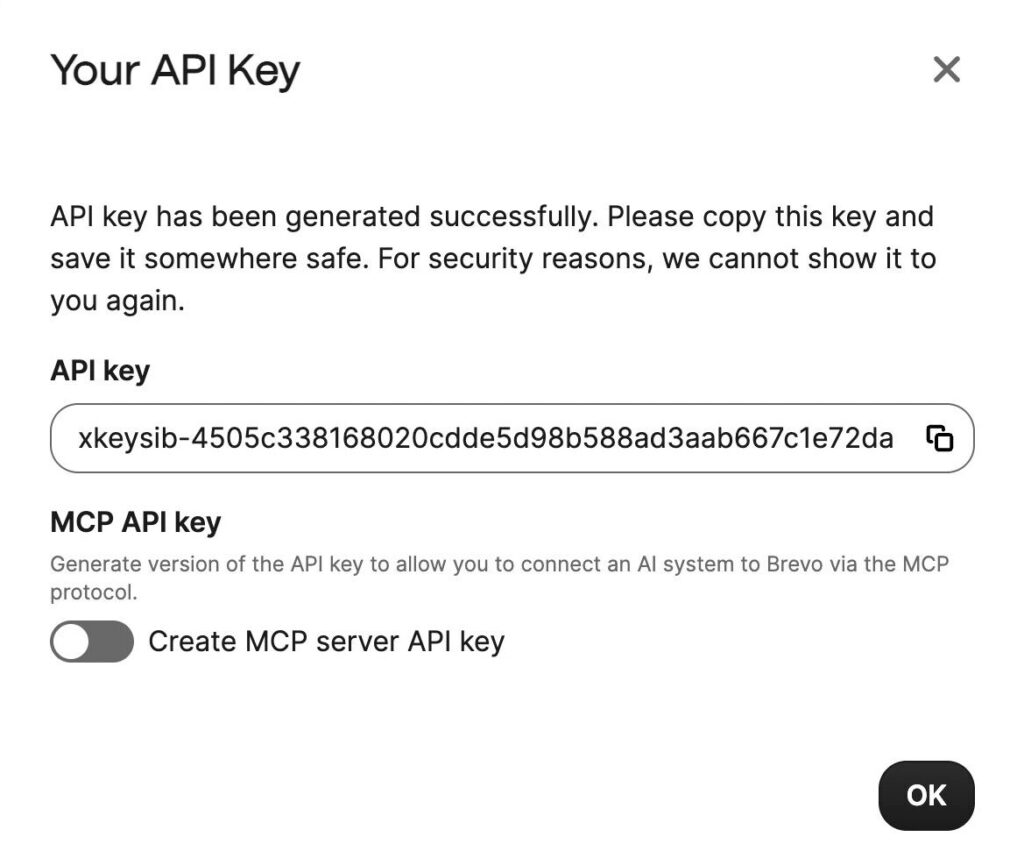
Brevo shows the key once. Copy it into a password manager now. If you lose it, generate a new one.
Ignore the "Create MCP server API key" switch.
Part 4: Connect WordPress to Brevo SMTP
Step 8: Install FluentSMTP
In WordPress, go to Plugins → Add New, search for FluentSMTP, install and activate. FluentSMTP is free, with over 600,000 installs and no paid tier.
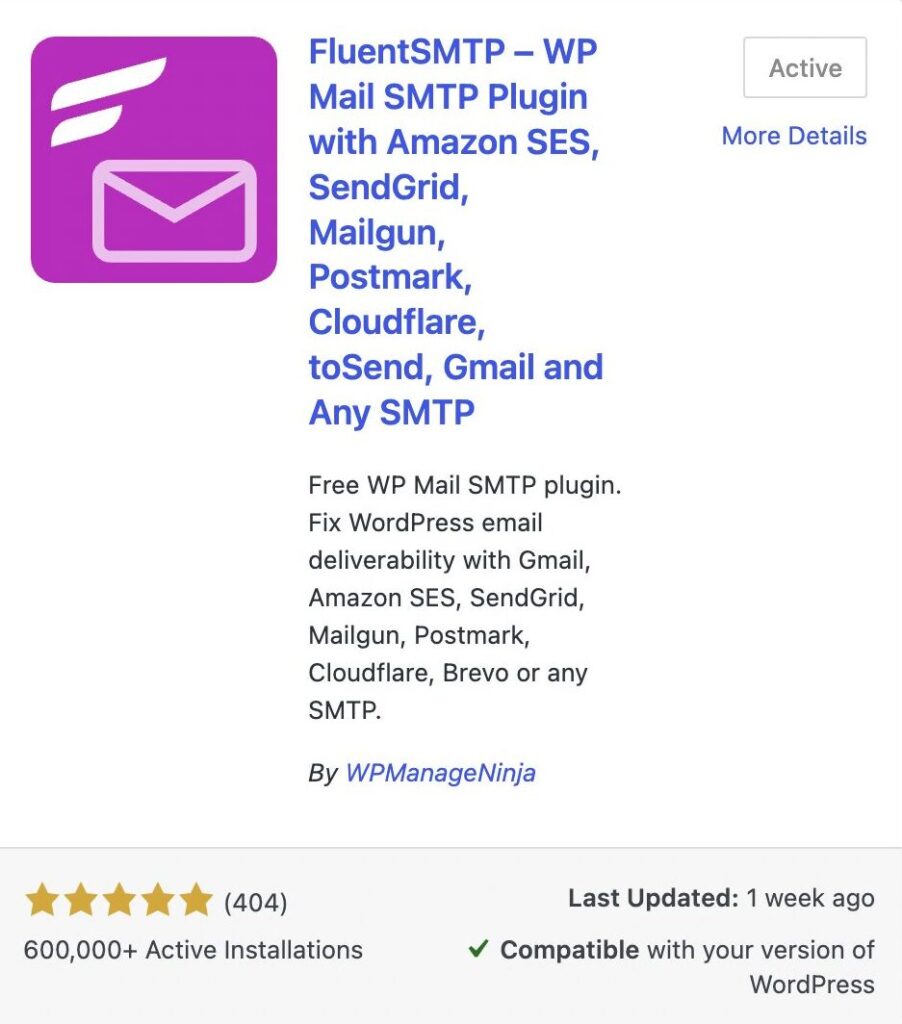
Alt: FluentSMTP plugin card in the WordPress plugin directory showing the Activate button
Step 9: Open FluentSMTP settings
Open Settings → FluentSMTP.
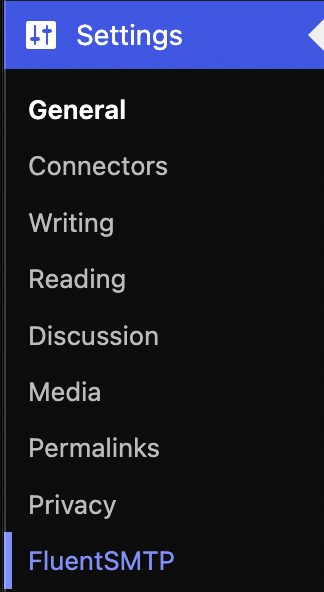
The entry sits at the bottom of the Settings menu.
Step 10: Choose Brevo
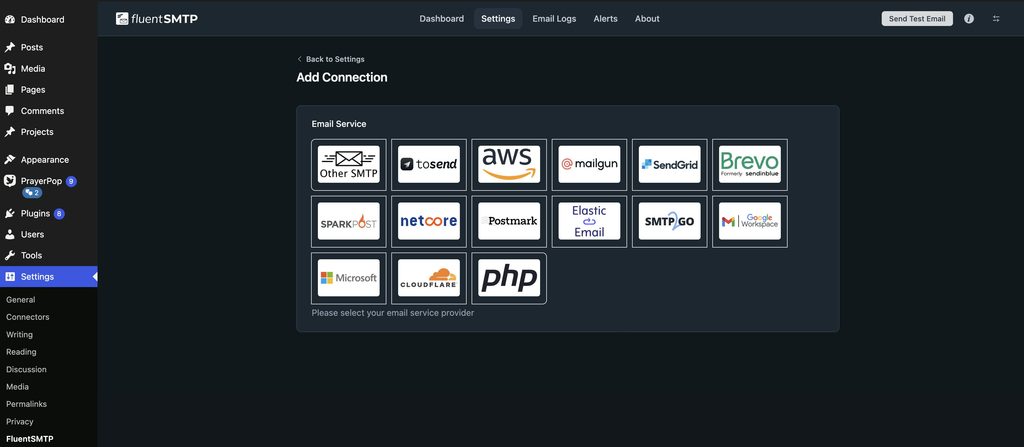
Click Add Connection and pick Brevo from the grid. It may still show its old name, Sendinblue.
Step 11: Fill in the form and save
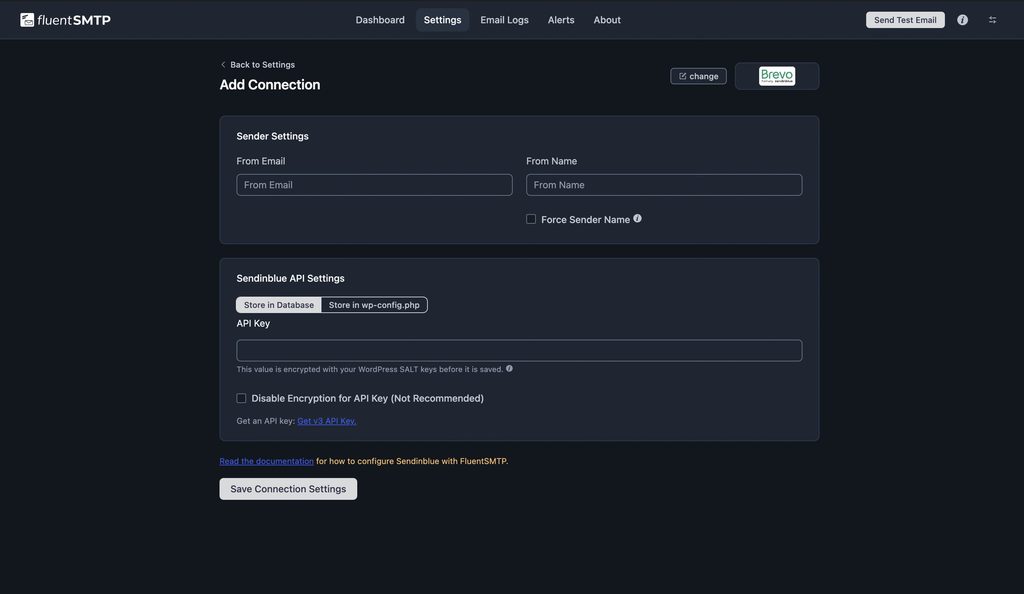
Three fields:
- From Email: your verified sender address from Step 3
- From Name: your church's name, which is what recipients see
- API Key: the key from Step 7
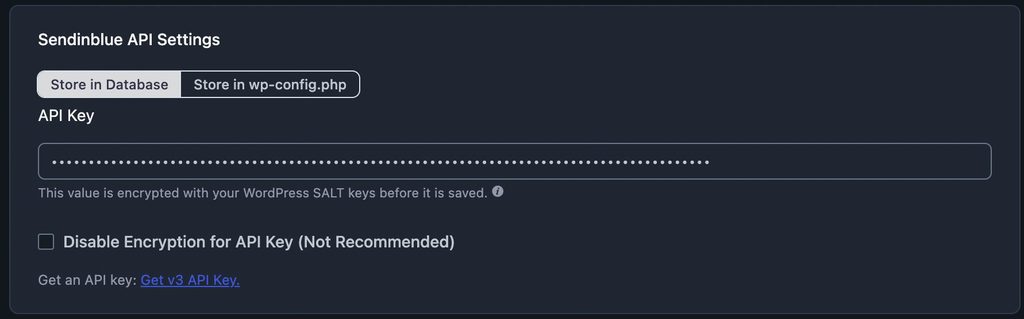
Leave "Store in Database" selected and "Disable Encryption" unchecked.
Click Save Connection Settings.
Step 12: Confirm it is the default
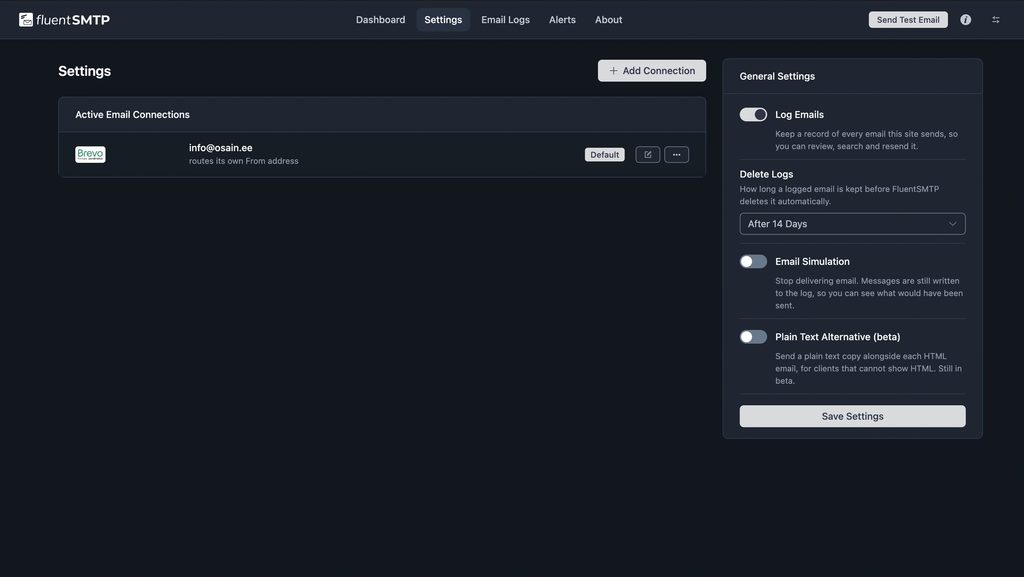
Leave "Log Emails" on. It records every email the site sends, which is the first thing to check when one goes missing.
Part 5: Test it
Step 13: Send a test email
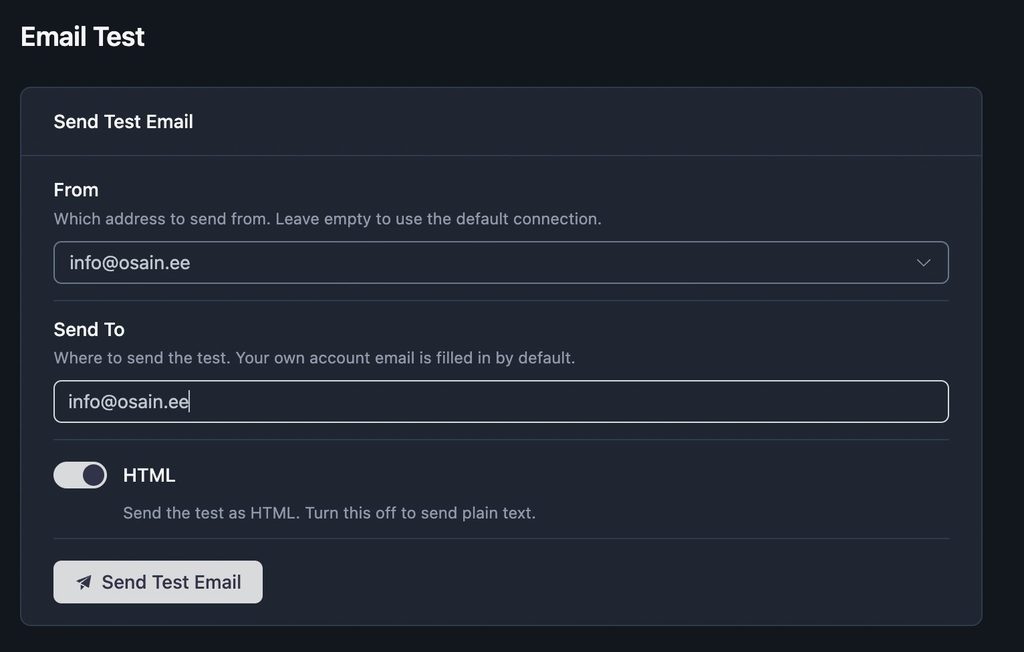
Click Send Test Email at the top right, enter your own address, and send.
Step 14: Check the inbox, not the screen
FluentSMTP confirmation screen reading Test email send.
Open the inbox, wait a couple of minutes, and check spam as well. If it landed in spam, see troubleshooting.
Step 15: Test PrayerPop
Open PrayerPop → Settings → Notifications and use Send Test Email (Pro only; on Free, go straight to Step 16).
Step 16: Submit a real request
Open your site in a private browsing window and submit one test prayer request. If the notification reaches your team, every PrayerPop email now goes through Brevo: alerts, chat notifications, receipts and digests.
Troubleshooting
The email is not in the inbox
Check spam first. If it is there, mark it as not spam and make sure Step 2 shows a verified domain. Authentication is the biggest single factor in staying out of spam.
"Unrecognised IP address" error
IP blocking was switched on in Step 5, and your site's address is not approved.
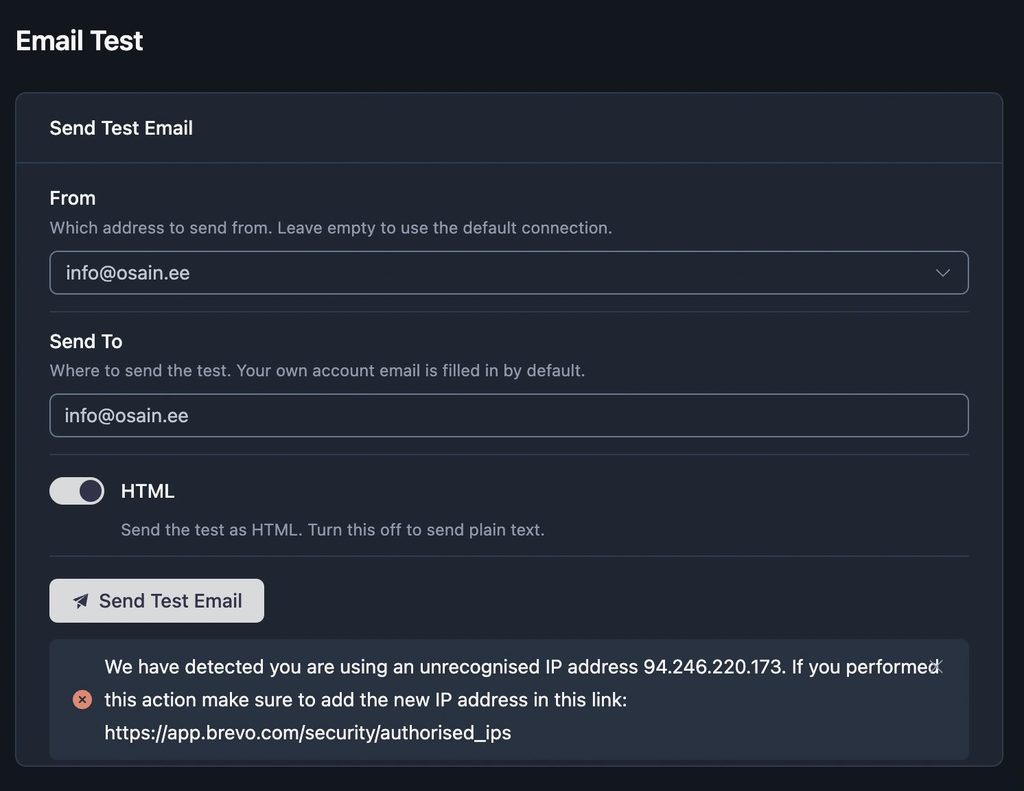
The error names the blocked address and links to Brevo's security page.

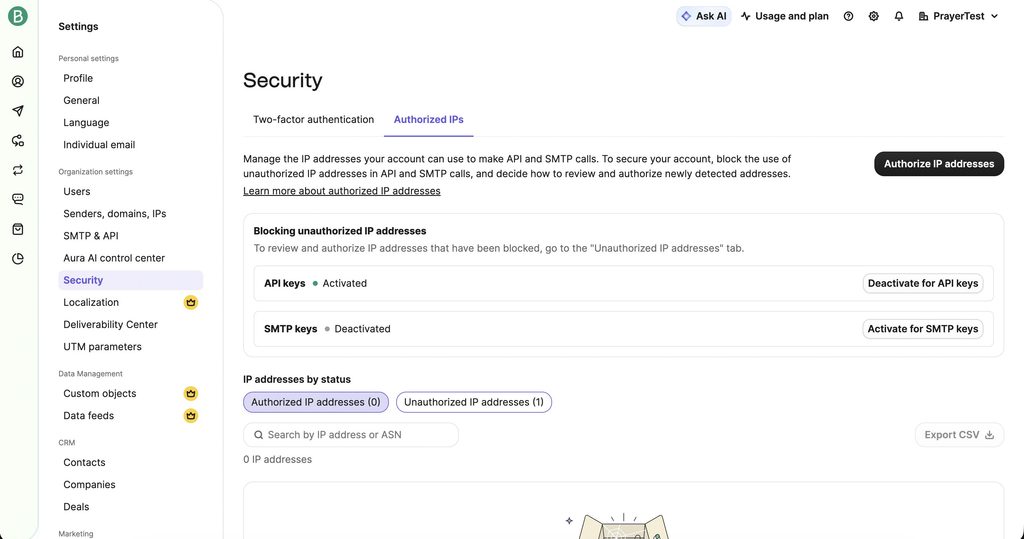
Simplest fix: click "Deactivate for API keys". Or keep blocking on and approve your address.
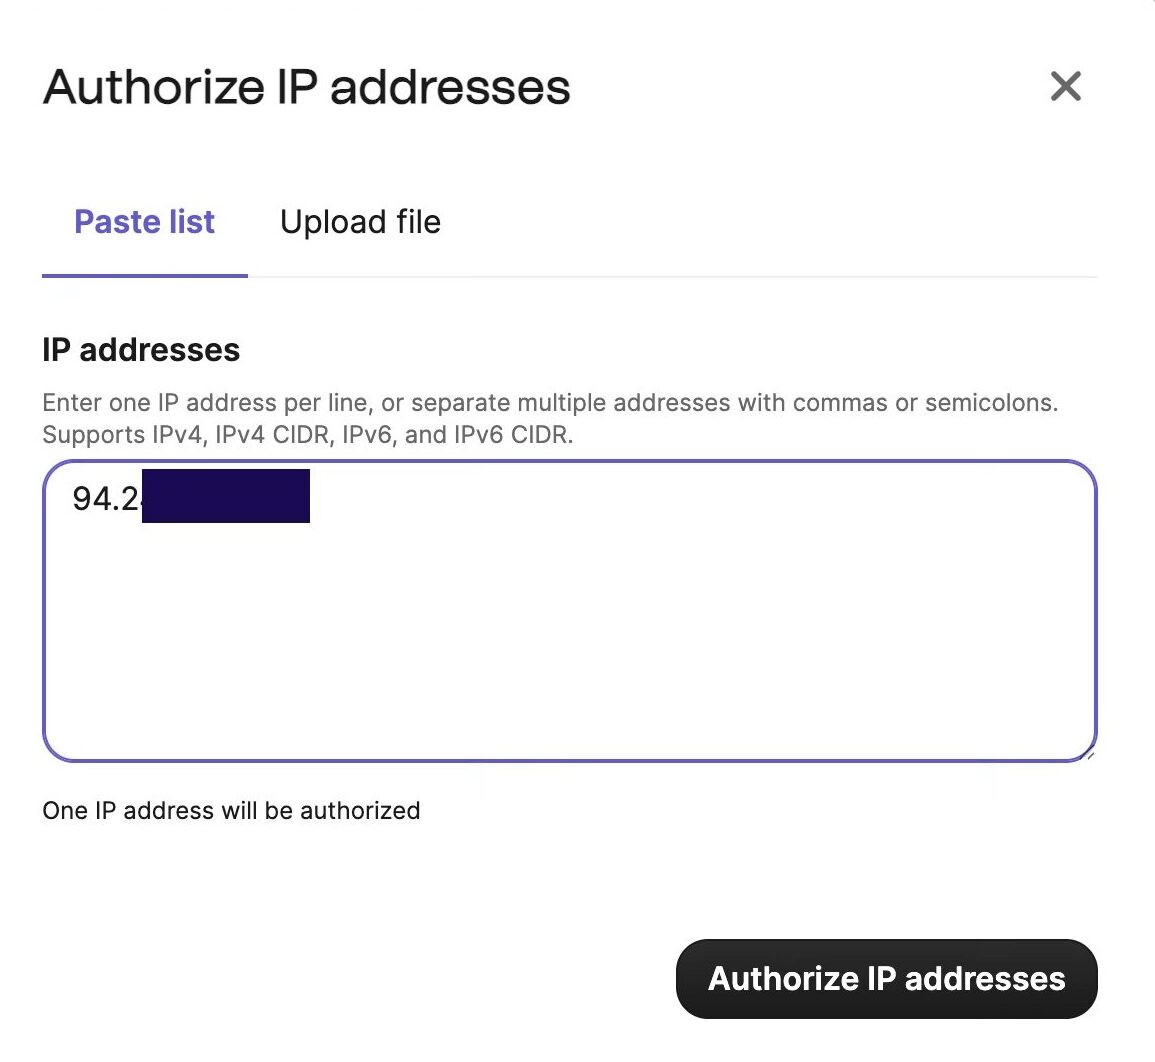
Paste the address from the error message, authorise it, and send the test again.
Still nothing?
- Domain verified in Brevo? Step 2 must show green.
- PrayerPop notifications on and set to Immediate? Digests only send on schedule.
- Recipient address correct, and one your team actually reads?
Brevo SMTP setup is complete when
- FluentSMTP shows the Brevo connection as Default
- The FluentSMTP test email arrived, not just "sent"
- The PrayerPop test email arrived
- A real test request produced a notification
- Your domain shows authenticated in Brevo
Two things for later. If you change the From address, the new one has to be a verified sender in Brevo or delivery stops. And when someone reports a missing notification, FluentSMTP's email log tells you whether the site tried to send at all.
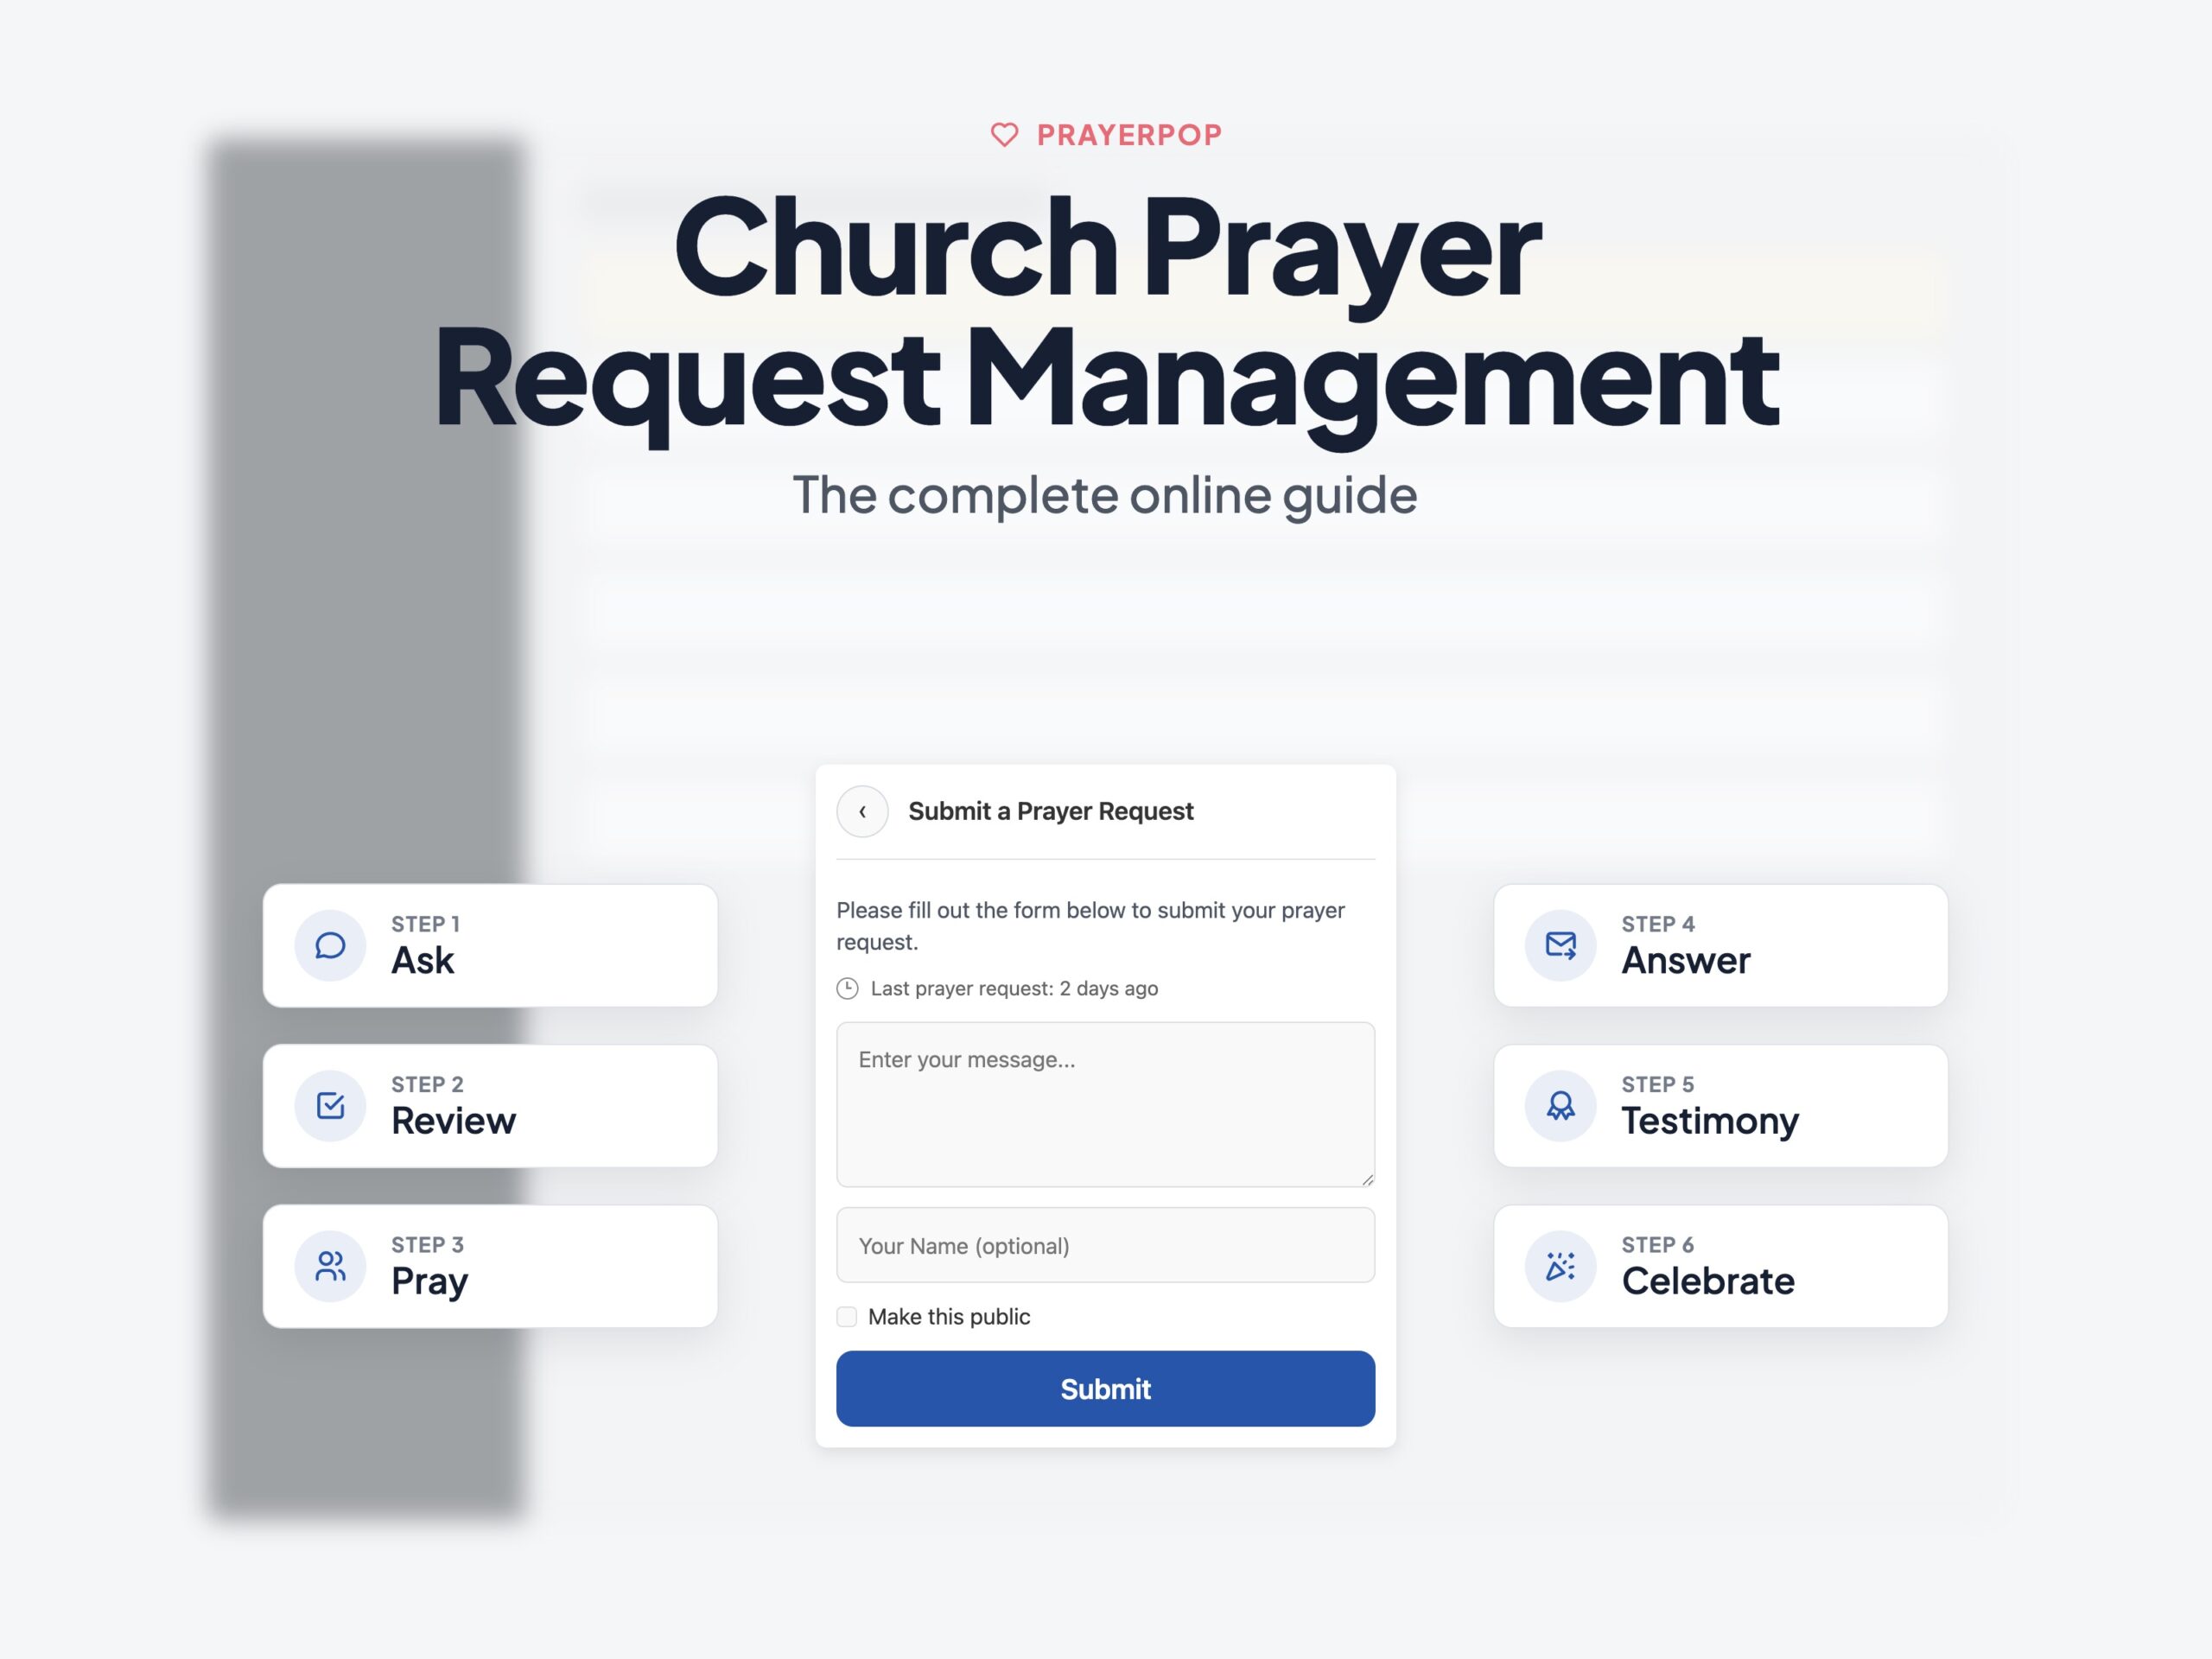
The complete guide to church prayer request management covers the workflow these emails belong to.